How to Fix a Dripping Tap in 10 Quick Steps
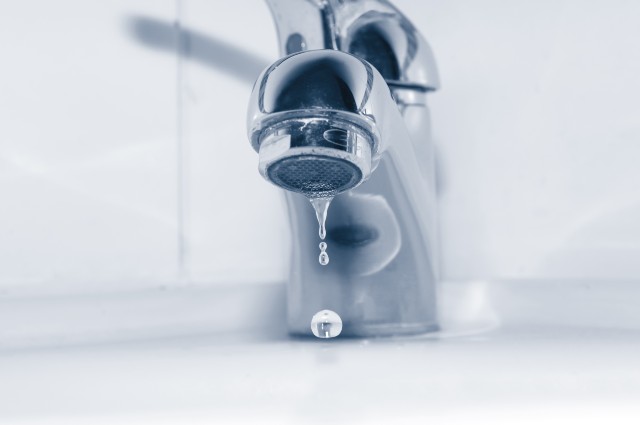
Leaking or dripping taps can be a serious issue in daily life. Not only do they produce an annoying sound, but the leaking can also result in the wastage of 3 gallons of water every day. One day, you’ll realise your water bills are rising and what you are paying for is simply draining out. Repairs might involve some up-front expenses but save you money in the long run. If you have some handyman skills, you can fix the dripping tap yourself. This blog post is for all of you who wish to fix this maintenance issue on your own.
Types of Taps
- Traditional taps. In traditional water tap types, the dripping is caused by a damaged washer that should be replaced.
- Monobloc lever taps. In a Monobloc tap, leaking is probably caused by a damaged ceramic cartridge. Replacement is the ultimate solution.
Tools You’ll Need
- An adjustable wrench;
- A cross-headed screwdriver;
- Replacement cartridge or O-rings;
- Plumber’s tape.
How to Fix a Dripping Tap
The rhythmic and persistent sound of a dripping tap is not just a nuisance; it’s a silent waster of water and money. Fixing a dripping tap is a straightforward DIY task that can bring peace back to your kitchen or bathroom, and at the same time, contribute to water conservation.
Step 1. Turn Off the Water Supply
First, find the water shut-off valves under the sink. If the tap does not have a dedicated valve, turning off your home’s main water supply will help avoid any unpleasant surprises when the repair is being done.
Step 2. Close the Drain
To avoid losing small parts and to catch any water that may escape during the repair, plug the sink or place a rag in the drain. This simple step ensures a tidy and stress-free fixing process.
Step 3. Remove the Tap Handle
Using a screwdriver, carefully remove the screw holding the tap handle in place. Be attentive, as some handles may have a cover that needs to be gently pried off before accessing the securing screw.
Step 4. Expose the Cartridge or Valve
With the handle removed, you’ll expose the cartridge or valve. Employ an adjustable wrench to unscrew it in a counterclockwise direction. This step is pivotal in accessing the components that may be causing the persistent drip.
Step 5. Inspect and Replace Washers or O-rings
Examine the condition of the O-rings and washers inside the cartridge carefully. To ensure a flawless and tight seal, it is crucial to check for any signs of wear, damage, or looseness in these parts. Should any of these issues be discovered, swap out the compromised O-rings and washers for new ones promptly.
Step 6. Apply Plumber’s Tape (If Needed)
For taps with threaded connections, wrap the plumber’s tape around them before reassembly. This simple addition ensures a secure and leak-free connection.
Step 7. Reassemble the Tap
Gently replace the cartridge or valve in its original location, making sure that it precisely aligns with the internal components of the tap. Use the adjustable wrench to gradually tighten it by rotating it clockwise. Take care to achieve the ideal level of tension because overtightening may cause harm to the internal components.
Step 8. Reattach the Tap Handle
Secure the tap handle back onto its stem and tighten it with the screw. If there was a cover, snap it back into place. This step completes the reassembly of the tap.
Step 9. Turn On the Water Supply
Gradually turn on the water supply and vigilantly check for any leaks around the reassembled components. If leaks persist, use the wrench to tighten the connections further.
Step 10. Test the Tap
Try the tap by turning it on and off when the water supply has been restored. Keep an ear out for any odd noises or vibrations that can point to more problems. This procedure guarantees the repaired tap’s general functionality.
How to Replace a Ceramic Disc Tap
Ceramic disc taps are different from conventional ones as they have a cartridge that houses two ceramic discs. A broken ceramic disc can cause the tap to leak and you’ll be forced to replace the whole cartridge.
- Remove the cartridge, take it to the shop and buy the same one to replace it.
- Cut off the water supply, unscrew the handles carefully and remove the decorative parts.
- The entrance screw is often hidden behind a small grub screw (which can be easily removed by a flat-head screwdriver) below the hot or cold indicator.
- Remove the shroud and the ceramic disc with the help of an adjustable spanner. Check for damages and replace, if required.
- Remove the cartridges. Remember which ones are for hot and cold water. Replace any damaged parts.
- Flip off or twist open the washer from the tap seat. Look out for any damages and replace them if required.
- If the rubber seal is worn out, change it.
- Make sure all the replacing parts are correctly sized and fit properly.
- Reassemble everything.
- Bring back the water supply by turning the knob gently.
Kitchen Tap and Showerheads Leaking
Damaged O-rings are often the cause of a leaking kitchen tap. The valve body includes seals, washers and O-rings. If after changing the old washer the tap is still leaking, check the O-rings. Remember to never over-tighten the taps during daily use. This could easily damage the O-ring and the washer and ultimately cause a leakage.
Often, the shower head leaks right in its connection point. Other common places are the armour, between the showerhead, body and swivel ball. If you have to replace a tap, go for brass taps plated with chromium.
Takeaways
- In order to avoid a dripping tap, make sure that you have the right water pressure and never over-tighten the fixtures.
- Most of the time, fixing a broken tap could lead to replacing the whole fixture.
- Having second thoughts on DIY repairs? Then consider booking a professional tap repair service.
How to Fix a Dripping Tap in 10 Quick Steps
Need help? Hire the London Property Service experts today by giving us a call on 020 3078 5920.